LAB
PROJECT 02: Java GUI – Student Grade
Goal:
In this project exercise, you will learn how to:
1.
Install the Java
Eclipse Windows Builder software
2. Create a Java GUI application using the JFrame
Library Classes.
3. Use an Absolute
Layout to construct the content Pane
of the GUI window
4. Add JLabel, JTextBox and JButton components to the
content Pane
5. Add the Event
Code to the JButton
6. Declare the Variables
7. Use a Try
Catch Block to perform input error
handling.
Program
Specifications:
Create
a Java GUI program. The user enters the student ID,
first and last name, total Lab exercises points, total Project points and Final
Exam points. The program then calculates the student total points earned and
the student's letter grade.
Pre-requisites:
1.
Create a folder on your desktop Project-2
2. Launch Java EE- Eclipse
Note: You will need to use the Java
Perspective Workbench for this exercise

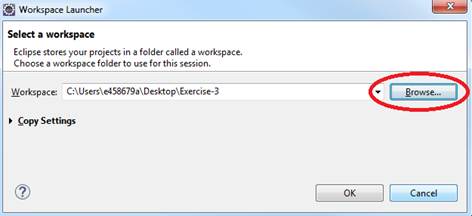
3. Setup your Eclipse Workspace to point to the Project-2
folder
a. Select File-> Switch Workspace
b. Browse and select your Project-2 folder as your Workspace.
Software Installation Pre-requisites:
You will need to have install
the Java Eclipse
Windows Builder.
NOTE: In the LMC Computer Lab, this already has
been installed.
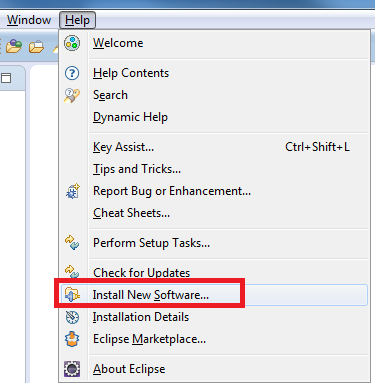
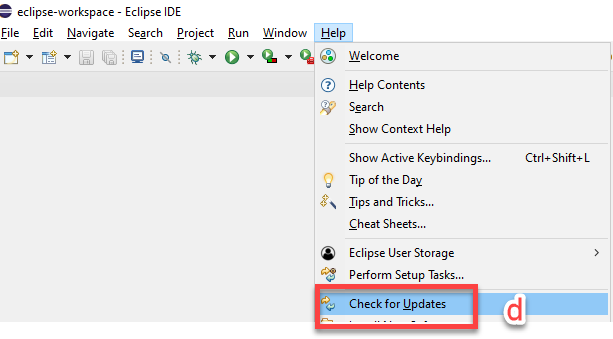
1. Select Help-> Install New Software
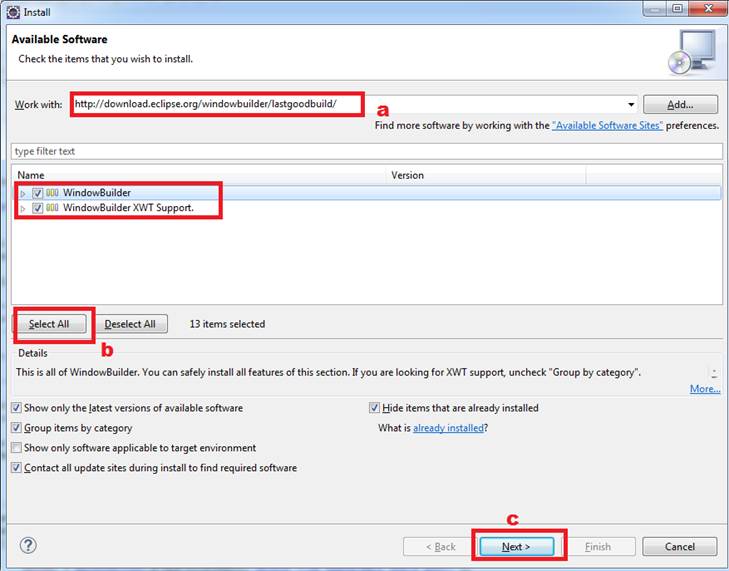
2. a. Copy and paste
the link below in the Work with box.
WindowsBuilder - http://download.eclipse.org/windowbuilder/lastgoodbuild/
b. Select All
c. Click Next and
complete the installation.
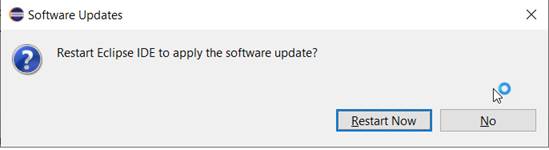
d. Select Help from the file menu and then Check for Updates
NOTE: Attached is
the WindowsBuilder repository components in case
installation steps above does not work
Repository Link
Requirements:
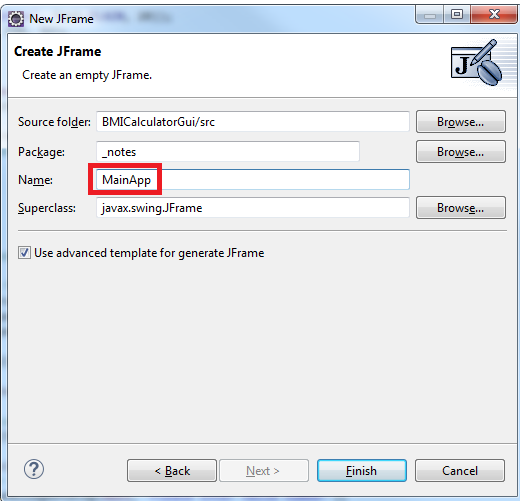
1. Create a Java Project and name it as StudentGradeGUI
2. Create the MainApp
using JFrame
a. Right click on the src folder. Select New-> Other
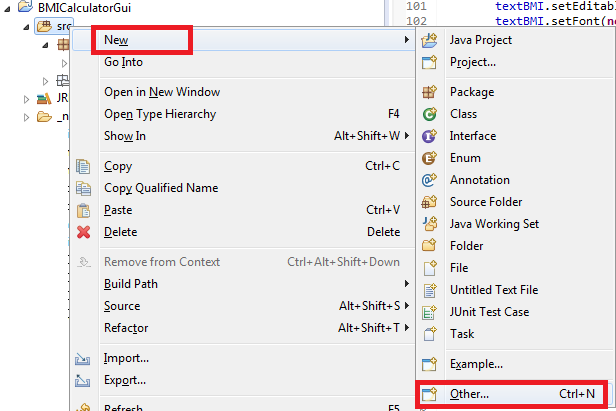
b. Scroll down.
Expand the Windows Builder folder.
Select JFrame and click Next
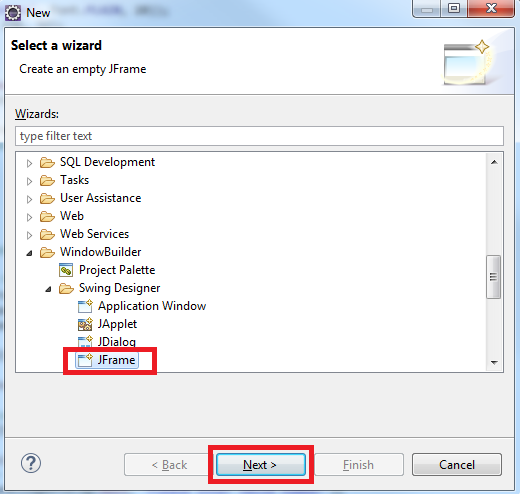
c. Type MainApp
as the name for the JFrame. Click on the Finish button.
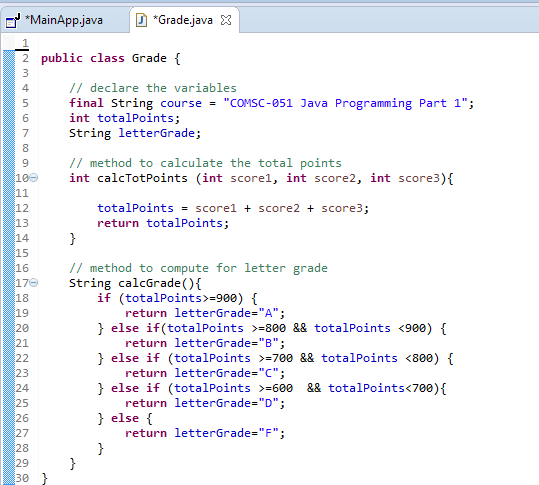
3. Create the Grade Class
a. Right click on SRC folder. Select New-> Class

b. Enter
the name of the Class
Grade

c.
Copy and paste the code below in the Grade
Class
|
//
declare the variables //
method to calculate the total points } //
method to compute for letter grade } |
Requirements
for the MainApp Class:
A. Create the JFrame
Components
1. Click on the Design
tab
![]()
2. a. Click on the Frame.
b. Resize the Frame to 500 x 400 by using the frame handles.
c. Set the resizable property to “false”.
Uncheck box
d. Add the title property “BMI Calculator”
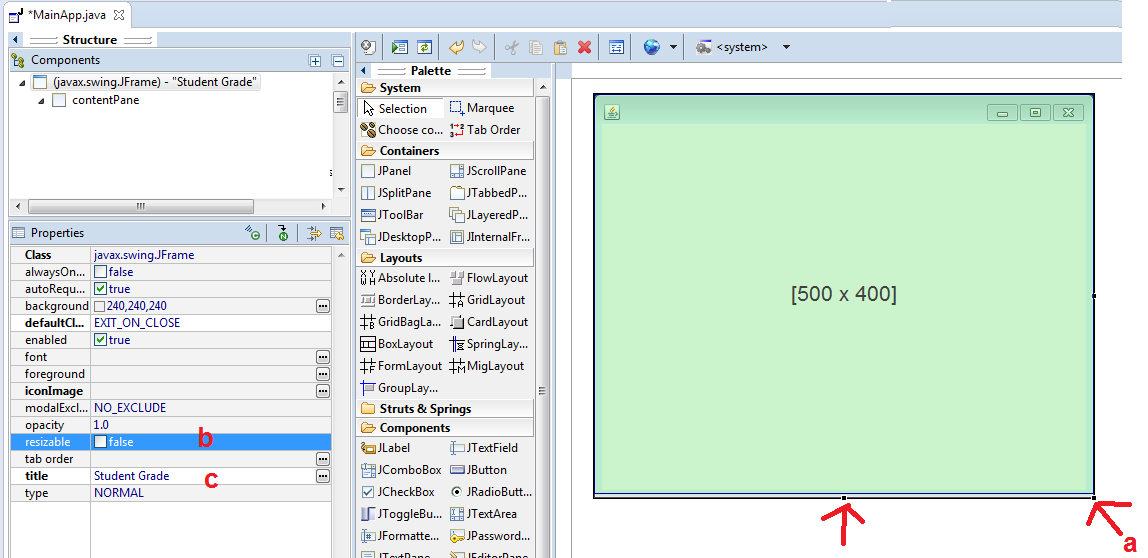
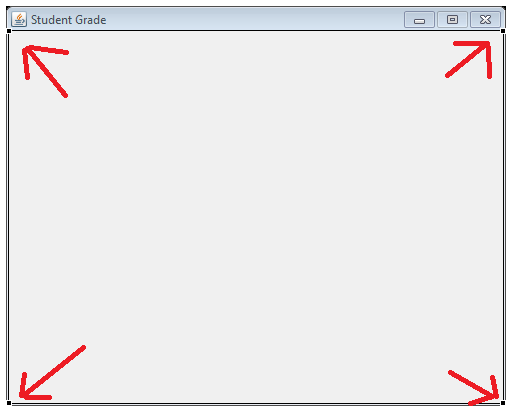
d. Click inside the frame container. Note:
You will see the square corner handles
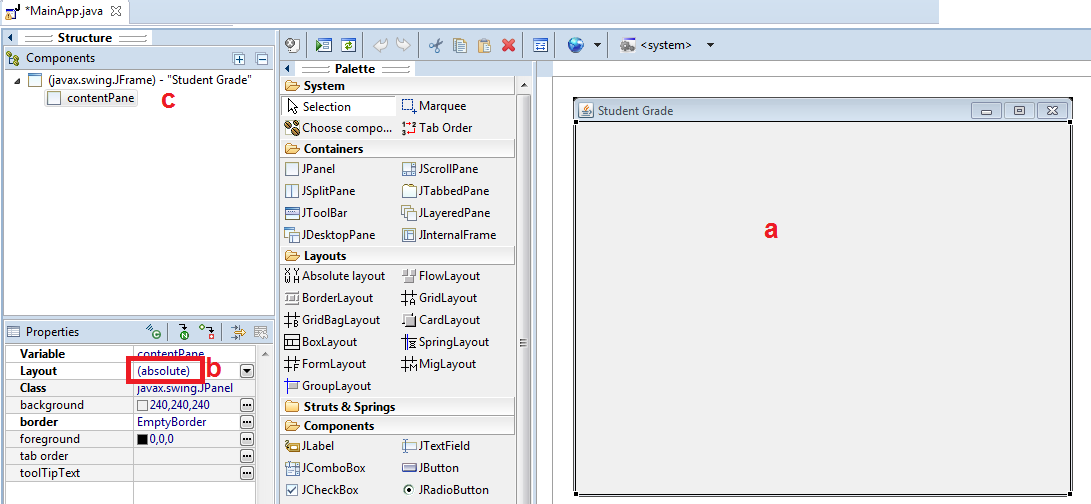
3. Create the Layout
a. Select and click the Absolute Layout
b. Click inside the container to create the Absolute Layout
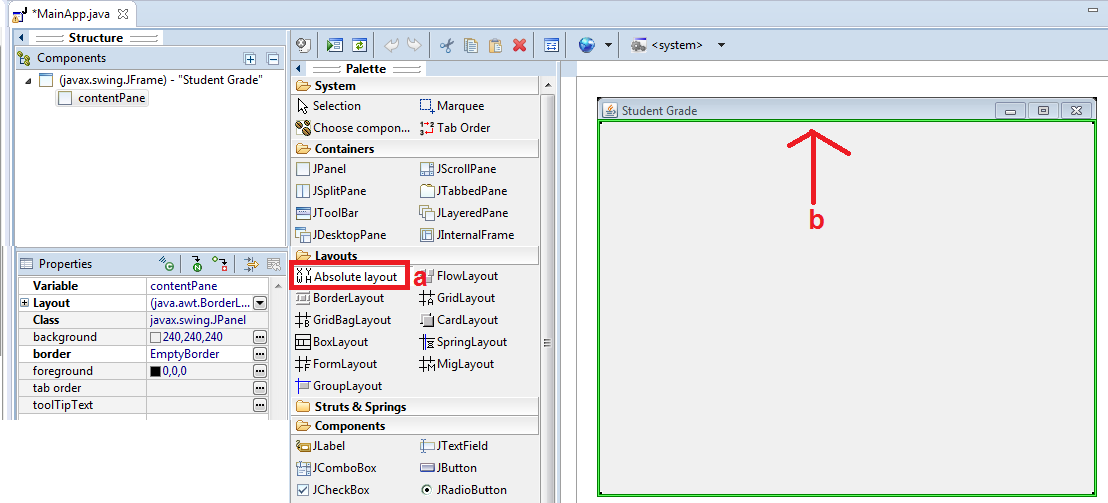
4. Verify the Layout is set to “Absolute”
a. Click inside the container
b. In the Properties panel, Layout
should have the “absolute” value
NOTE: If not, select the value from the pull down
arrow
c. Verify that you are in the contentPane
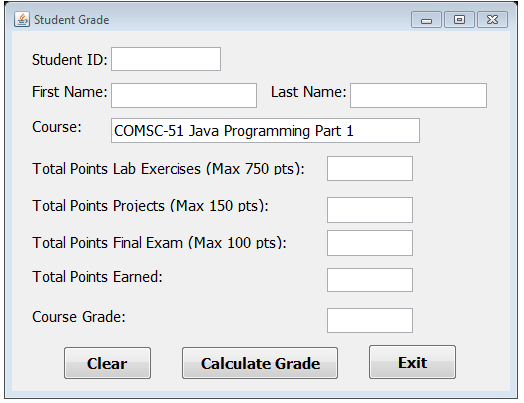
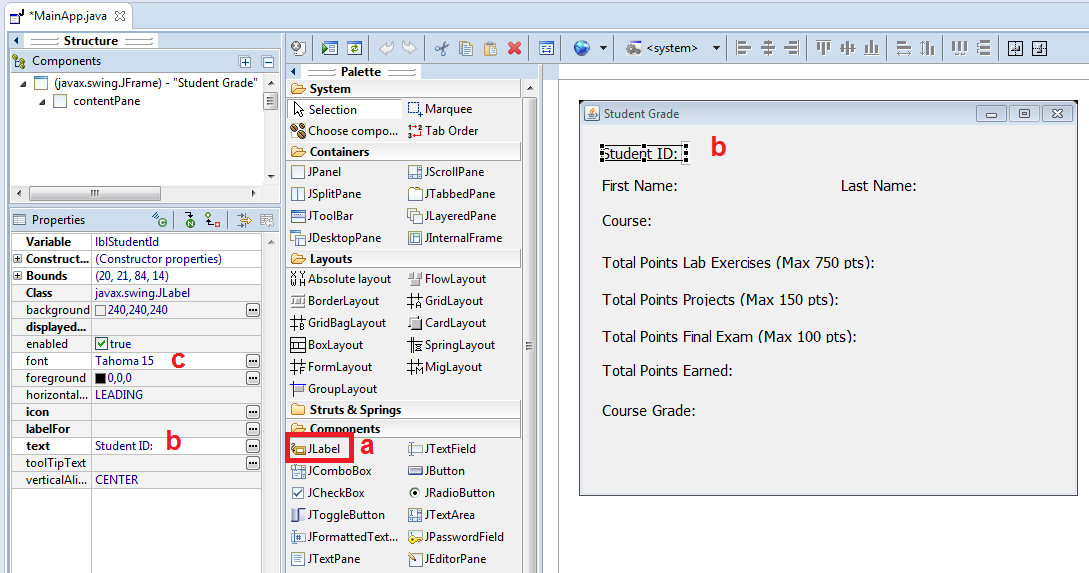
5. Create the Labels
a.
Select JLabel and drag the component
into the content pane.
b.
Enter
the text name of the label (see screenshot).
Resize the label by using the corner
handles
Position the label on the screen
c.
In
the Properties panel, set the Font size to 15
Note:
Create all of the labels as shown below
d.
Create the Text Field boxes
1. Select JTextField and drag the component into the
content pane.
2. Select to highlight the TextField box.
Resize the text box by using the
corner handles
Position the text field boxes
3. In the Properties Panel under Variable, name the text box (see list below)
4. Set the Font
size to 19
Note: Create all of the 4
Text Field Boxes and name them as follows:
IMPORTANT: Verify the text box names are correctly
entered.
txtStudentID
txtFirst
txtLast
txtCourse
txtLabPoints
txtProjectPoints
txtExamPoints
txtTotalPoints
txtGrade
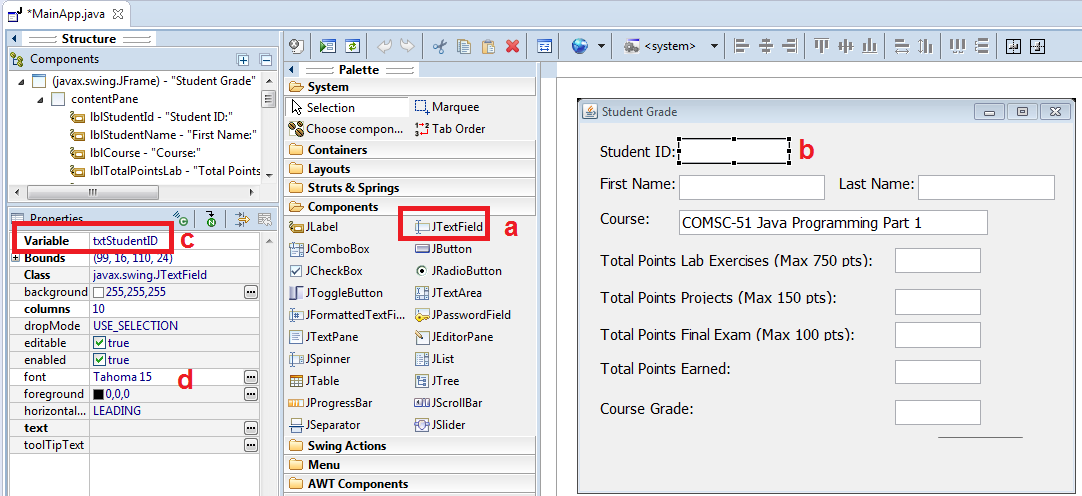
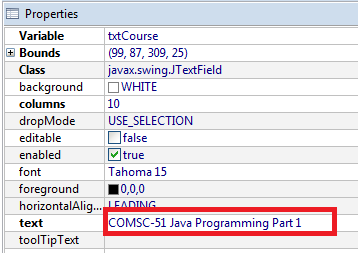
5.
For the txtCourse set the text value to COMSC-51 Java Programming Part 1
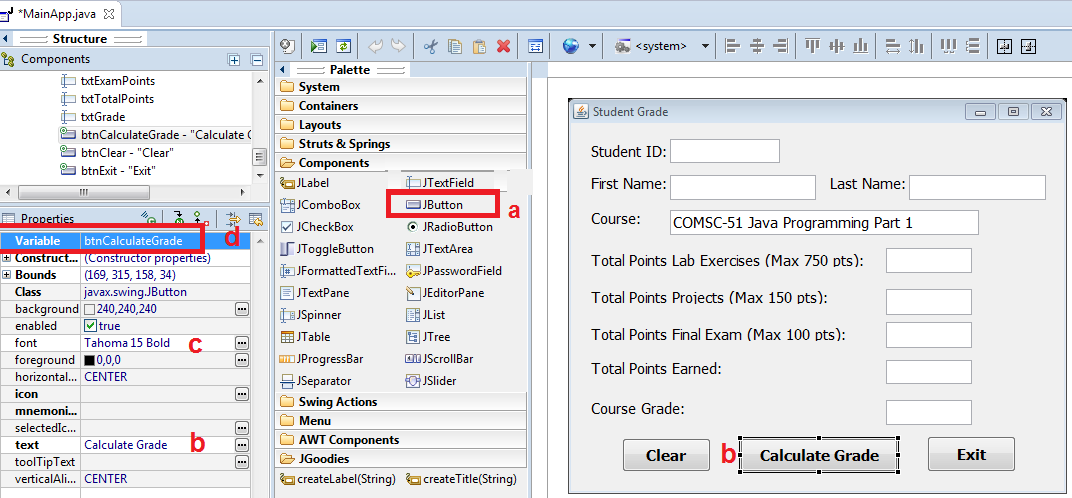
6. Create the Buttons
a.
Select JButton and drag the
component into the content pane
b.
In
the Properties Panel under Variable, enter the variable name (see below)
c.
Set
the Font Size (see
below).
Select to highlight the buttons.
Resize the buttons by using the
corner handles
Position the buttons
d.
Enter the Text that will be displayed inside the button.
Resize the button by using the handles
Note:
Create all of the 3 buttons and name as follows
Verify the variables names are
correctly entered.
Variable Name: Font Size Text:
btnCalculateGrade 15
Bold Calculate Grade
btnClear 15 Clear
btnExit 15 Exit
B. Add the Event Code for the btnCalculateGrade button
1. Right click on the button
2.
Select Add
event handler -> action -> actionPerformed
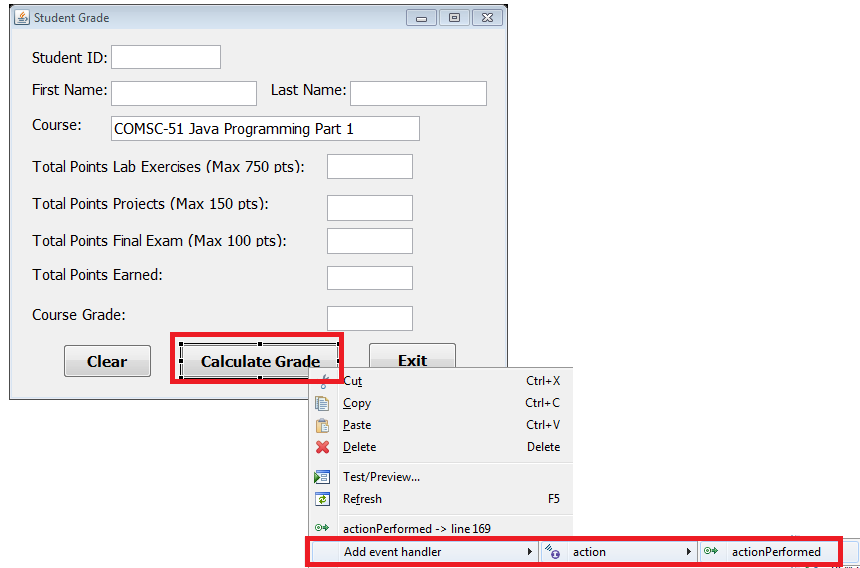
3. Below is the
event code to add in the void method actionPerformed for the
btnCalculateGrade button.
NOTE: You will need to be in Source
tab section to add the event code.
![]()
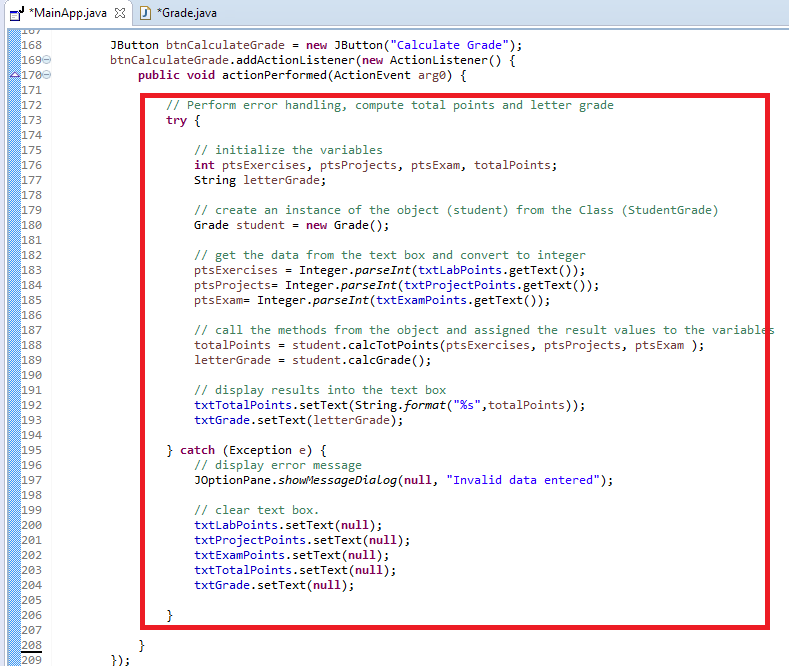
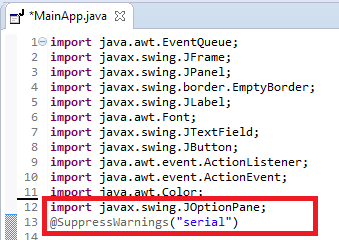
4. At the top of the source code before the MainApp class, add the following:
a.
import javax.swing.JOptionPane; (Note: This is used for the Show Message
Dialog box)
b.
@SuppressWarnings("serial")
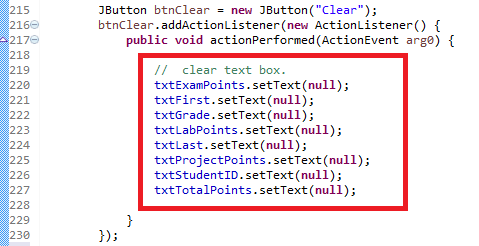
C. Add the Event Code for the btnClear button
1. Right click on the button
2. Select Add event handler -> action -> actionPerformed
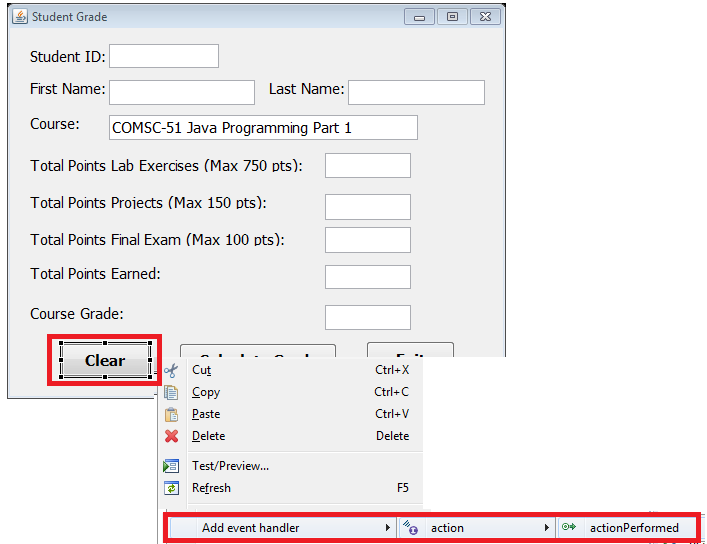
3. Below is the code
to add in the void method actionPerformed for the
btnClear button.
NOTE: You will need to be in Source
tab section to add the event code.
![]()
D. Add the Event Code for the btnExit button
1. Right
click on the button
2. Select Add event handler -> action -> actionPerformed

3. Below is the code to add in the void method actionPerformed for the
btnExit button.
NOTE: You will need to be in Source tab
section to add the event code.
![]()

Test:
1. Save your Java code
2. Compile and run your Java program.
3. Verify there is no syntax, logical or run-time
errors.
4. Enter test data.
Submit:
1. REQUIREMENT: You will need to
submit a screenshot of the JFrame Main App Design
Mode in Project-02 Folder to receive points on this project
2. You will also need to include the screenshot showing the expected output after entering the test data above
3. Zip up
(compress) the Project-02 folder
4. Upload
the zip folder to the Desire2Learn Java GUI
Project’s Project-02 drop box.